Shooting in Aperture Priority Mode
Full disclosure: I tried to write this in a few short paragraphs and simply couldn’t. To a new photographer this is a very abstract and difficult topic, maybe the single most difficult topic for a beginning or transitioning photographer leaving the “phone”. So if you don’t completely understand everything or are not convinced, don’t worry now and you’ll learn little by little over time like everybody else.
I talk often about aperture because I feel it is the most creative tool you have at your disposal. It really helps you highlight your subject and eliminate distracting backgrounds and foregrounds in your composition. In addition, having lenses that we call “fast” with apertures like f2.8 gives us lots of latitude in challenging conditions like low light.
I shoot in aperture mode “A” or “AV” 95% of the time in my professional photography.
According to the dictionary, ‘aperture’ means ‘an opening, hole, or gap.’
The concept of aperture or f-stop can be a little abstract at times as its not completely intuitive as you can see in the chart below.
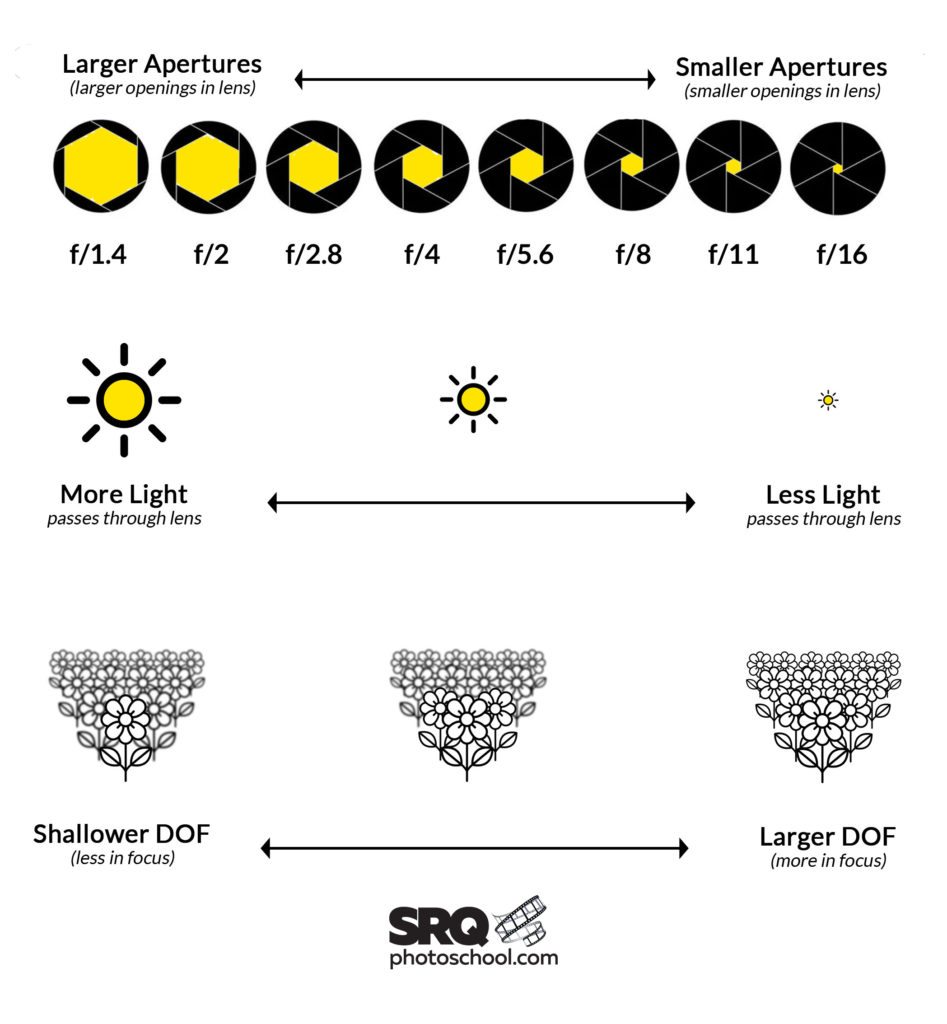
Basically stated:
The larger the f-number, the smaller the aperture. Think f/16
The smaller the f-number, the larger the aperture. Think f/2
A large opening (small f-number) lets a lot of light to pass through the lens allowing you to shoot in lower lighting conditions at higher shutter speeds. Also, more of the areas outside of what you have specifically focused on (think foreground and background) will be more blurred.
A small opening (large f-number) lets less and less light to pass through the lens allowing resulting in more of your composition to be in focus.
The other component of shooting in aperture priority is selective focus, meaning you tell the camera what your subject is and where in your composition you want to focus on (your primary subject or intent). That’s important as aperture is relative to two things:
1. The point of focus
2. Your distance from that primary area of focus
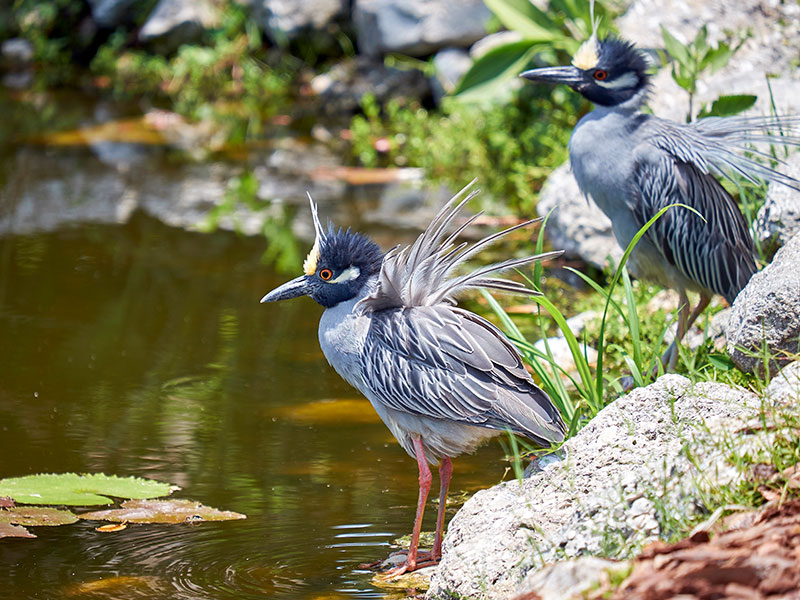
This is an example of an image shot at Selby Gardens with a very “open aperture” (f/2.8). Notice how the birds eye is in focus and the foreground and background is out of focus? Even the bird in the background is out of focus somewhat even though it is only a few feet behind. I was only about 10 feet away from the subject using a 200 mm lens.
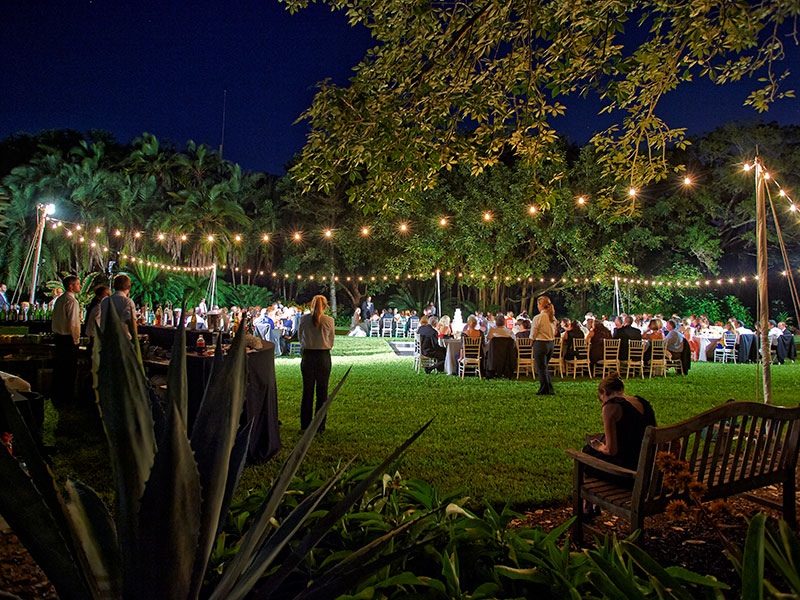
Here is an example of an image also at Selby Gardens with a more closed aperture of f/8, shot quite a ways away from the focus point of the first table of guests. Notice how everything is in focus including the foreground and background.
As an example if you are shooting at lets say an aperture of f/4 and are only a few feet away from your subject than only a very small area in front and behind of your focus are will be in sharp focus. In this example perhaps only a few inches. Now take that same aperture of f/4 and move back from your subject maybe 20 yards and focus on your subject and you’ll discover that almost the entire image including the foreground and background is entirely in focus.
An extreme but very common example of this is when you are shooting landscapes (also called scenics) where you are a long way away from your subject of lets say a mountain range or city skyline it really doesn’t matter what aperture you are using as most everything will be in focus and all that matters is you have a fast enough shutter speed to keep the image sharp.
The more you experiment with this the more comfortable you will become. Practice makes perfect.